Hyper-V is a Windows virtualization program that allows you to create virtual computers and servers running any operating system, even non-Windows OS such as Linux, or iOS. Virtualization is used as a sandbox, where changes to a system be tested or malware can be studied without fear of damaging vital services. Virtual machines can also be used to run websites or cloud services. This allows for a more efficient use of server resources, for example one server can run several services and thus each site does not need a dedicated server.
System Requirements
- Windows Professional, Education, or Enterprise. (It can’t be accessed on Home)
- 64-bit processor with Second Level Address Translation
- a CPU with VM monitor Mode extension
- minimum of 4GB of memory
Running Hyper-V
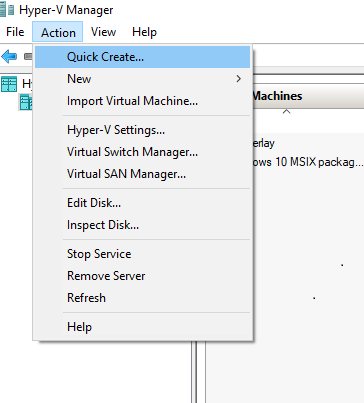
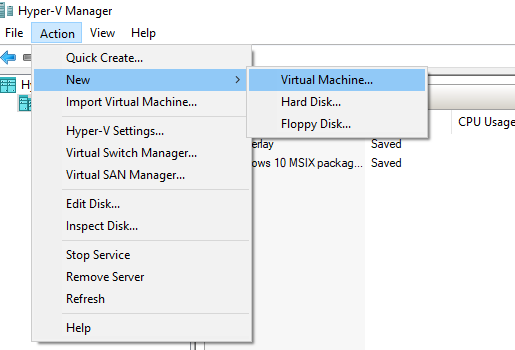
To create a Virtual Machine, either click Quick Create or New>Virtual Machine in the Action Tab. In Quick Create you can either choose one of the OSes on offer or a different ISO image file that has been stored on your PC. Hyper V will then install the OS as normal.
Hyper V Switches
Next you have to decide how you want to network your VMs. You can do this by Hyper V’s virtual switches.
There are three types of virtual switches.
- Private – isolate VMs from other networks. That is, they only communicate to other instances on that network.
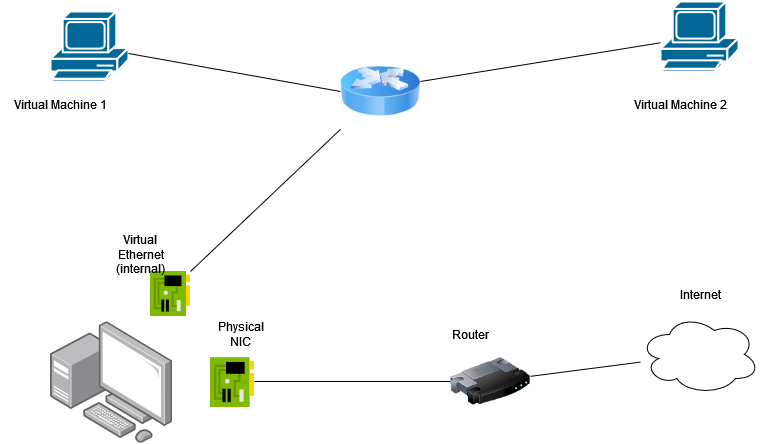
- Internal – creates an isolated virtual network that can connect VMs to the host via a virtual adapter. The VMs can not access any network other than the internal network.
- Default – connects the VMs and the host to the internet via a virtual switch
- External – connects the VMs to the internet via the host’s connection
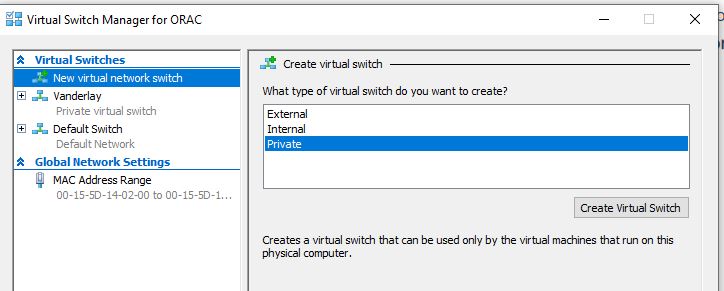
To set up a virtual switch click on virtual switch manager in the action tab on the right hand side of the Hyper V window.

Private switches
To create a private switch, click on the private switch option in the Virtual Switch Manager, and the click on Create Virtual Switch. You also have the option to rename the virtual switch. You can then assign the switch to a VM by right clicking the VM, select settings and then network adapter. Then click on the Virtual Switch drop down menu.
You will have to assign IP addresses to each VM. Assigning each VM a default gateway or DNS server is unnecessary as all machines on this network can not connect to any other network, including the internet.
I had an interesting hiccup with using Hyper V. I set up a server 2022 and a windows10 VM. I then assigned them IPv4 addresses. The windows machine could ping the server, but the server could not ping the windows machine. After a short googling I learnt that Server2022’s Windows Defender Firewall was blocking pings from my server. I fixed it by going into Windows Defender Firewall with Advanced Security and then went to inbound rules. I then allowed incoming ICMP echo requests and it started working.
Internal Switch
An internal switch connects all VMs on that network to the host computer via a virtual adapter. The VMs on this network can also connect to any host on the host’s LAN, but they can not connect said hosts to any other network (including the Internet). Each host on the internal network switch will also require an IP address and subnet mask. They can be static or assigned by DHCP.
Default Switch
The Default switch allows your VMs to connect to the internet via you host machine by making the host machine the default gateway for the network. The host provides DHCP and Network Address Translation (NAT) for the VMs which allows them to connect to the internet. However, because the default switch is connected to your LAN, the hosts on it become vulnerable to whatever changes are made on your VMs and their network.
These risks can be ameliorated by enabling sandbox mode in Windows. This can be instantiated by going into Windows features and ticking Windows Sandbox. Unfortunately, this feature is only available on Windows Professional, Education and Enterprise.
The Default switch can be assigned via the drop down menu in the network adapter settings
External Switch
Unlike the default switch, all VMs including the host machine, connect to the internet via the Physical Network card when using the External Switch. Therefore, the host machine shares the same network as the VMs, and all network traffic must go through the physical network card.
However, it may be more advantageous for the host machine to be not on the same network as its VMs. The host can be excluded from this network by unclicking the tick box underneath the External Network drop down menu.
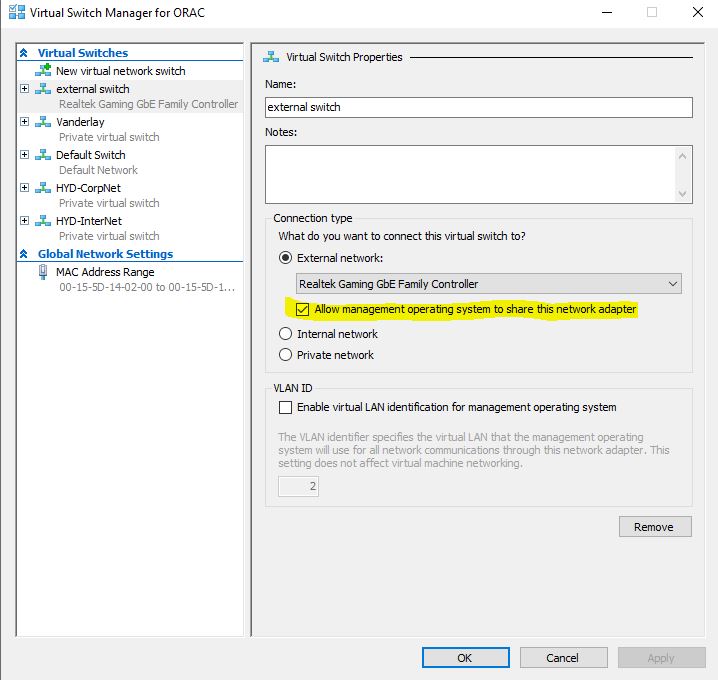
Doing this will result in the host computer being excluded from the LAN and thus losing internet connectivity. You can get around this by installing another ethernet connection. You then allocate one of your spare NICs to the host computer and the second one to the virtual switch. You can do this by clicking the desired NIC in the drop-down menu in the external network.