Creating the Virtual Server
In this project I am setting up an Active Directory Home Lab using Hyper-V on my home PC. Hyper-V is a popular virtualization program that comes with Windows Professional and Education. Fortunately for me, I have an education account through La Trobe university where I am working on a diploma in Information Technology.
First, I had to download a trial copy of Server22 from Microsoft’s site. After that I opened Hyper-V and right clicked on my computer (Orac in this case). Then click on > New > Virtual Machine. Then I went through the installation wizard, named the new virtual machine (VM) Server 22 and chose the default switch under networking and then clicked install from an image on my hard drive. When that was finished, I created another VM and clicked on the quick create button. From there I chose the Windows 10 MISX packaging environment. This will be a client machine that I will use to connect to the Server 22 machine.

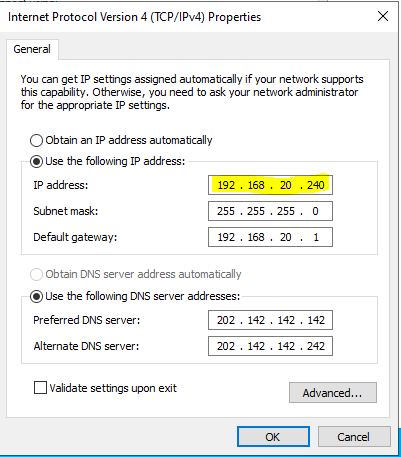
Setting up a Static IP Address
First, I gave Server22 a static IP address by following these steps.
- Go to the local server tab on the Server manager dashboard.
- Click on Ethernet.
- Right click on Ethernet.
- Tick IP4v
- Click assign IP address and enter static IP address.
Setting up the server
To set up the server for Active Directory, go to the server page and click on the “Manage” tab in the upper right corner. Then click on Add Roles and Features, then click on Role based or Featured based installation. Click next for Server Selection and then tick the Active Directory Domain Services. Make sure to tick management tools as well. Click next on the Features page and then hit install. Close the tab after installation and then go back to the Server Manager dashboard. In the top right-hand corner, there will be a yellow flag. Click on that and click on Post Deployment Configuration. Then click on Add New Forest. Enter the new Domain name (I chose Vanderlay.com), and then enter a password for Server Recovery mode, make sure it’s different to your server password. Don’t worry about the DNS options, and enter the NetBios domain name, I chose Vanderlay. Then click install and wait for it to restart.
Adding our first user.
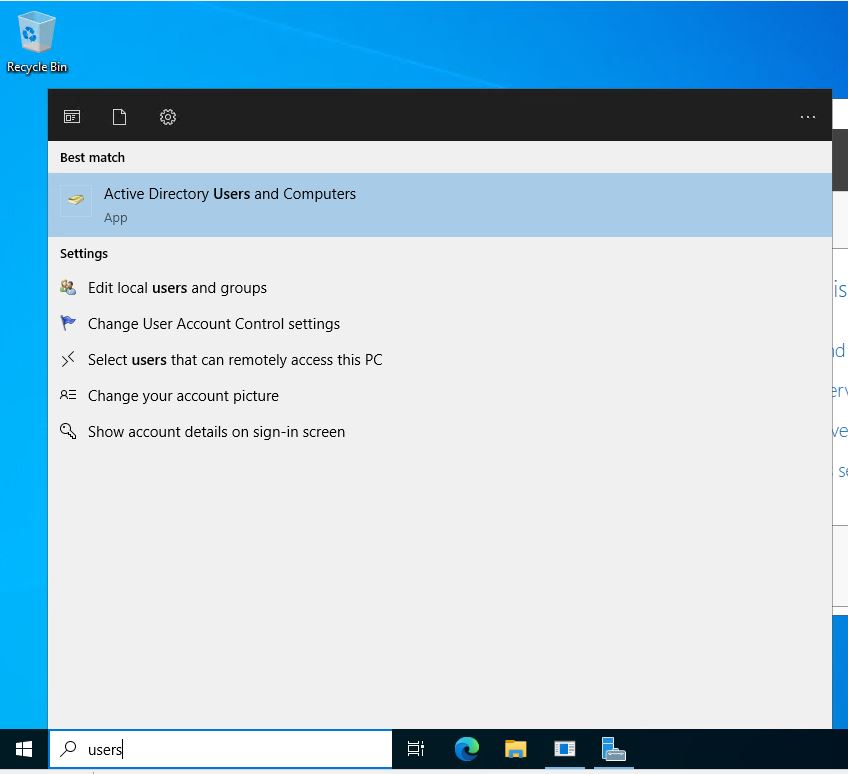
After the Domain Forest has been installed, go to the Windows Search bar and type Active directory and users. Go to the action tab and click on New and then click on User. George Constanza’s details will now be added to the group.
Creating the client machine.
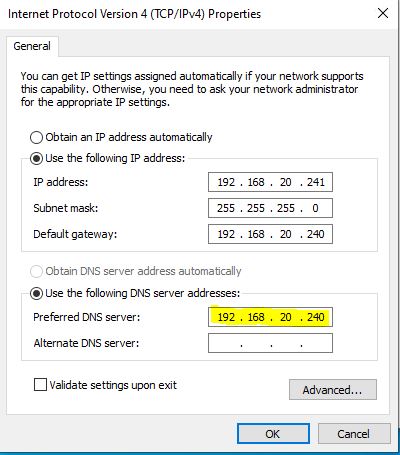
Creating the client machine is almost the same as creating the virtual server. I went with the quick create option when I right clicked on my computer, as this does not require downloading another OS. Add the client’s machine to the Active Directory At this point I ran into a few issues. Firstly, Window’s 10 will ask for a user’s account. I made the mistake of using my university login as my account, and I could not change the domain to my Active Directory Domain. After half an hour of trying to change the Windows 10 account I deleted the client machine and started again with a fresh install. For the next installation I used my personal outlook account. Though I didn’t realize it the time you can setup Windows 10 without an account A second issue arose when I tried to add the client’s machine to Vanderlay’s network. It just could not find Vanderlay’s server. After a week of trying, on and off, to find a solution I found a video that suggested changing the client’s DNS server settings to Vanderlay server’s. The process is similar to setting up a static IP address, though with the client being a Windows 10 System I had to tweak things a little.


Set up the DNS configuration
Type Ethernet Settings in the search bar or find it via the control panel, and then click Change adapter options. Right click on the ethernet device and scroll down to Internet Protocol Version 4(TCP/IPv4). Go to your server and type CMD in the Windows bar. Then in the run folder type ipconfig /all, then copy your server’s IP address and paste that into the DNS server address setting on your client’s machine. The next step is to add the client’s machine to the server. Type Advance System Settings into the Window’s search bar and hit enter. Then click on the Computer Name tab and under that click on Change button at the bottom of the tab. Check the Domain button and enter your domain name. The client’s machine will then ask for a user name and password. Enter the user name and password of someone with administrator privileges on the server.
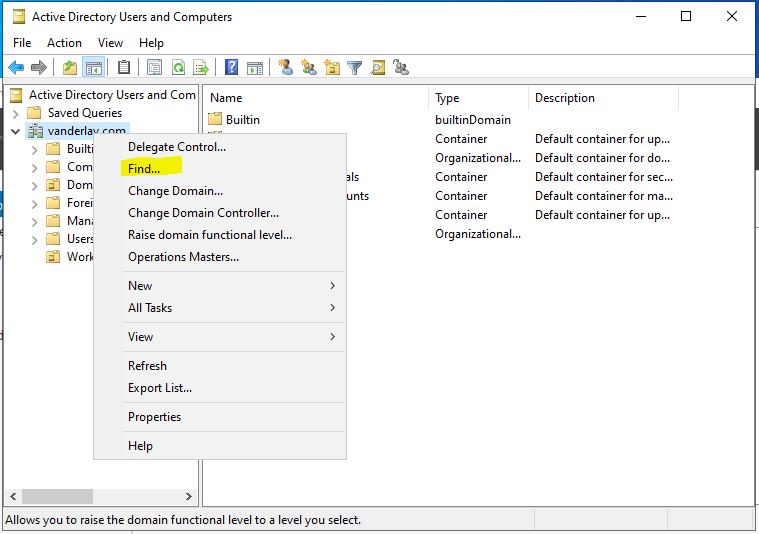
Find a computer on an AD network

